2Bit's Mapping Corner on www.PythonOnline.co.uk
ET Mapping Tutorial

Lesson 3

Topics

Making your first map
 
Duplicating and rotating brushes
Placing the player start points
Defining the world co-ordinates
Compiling the map
Testing the map
Back to main menu
Duplicating and rotating brushes [Top]
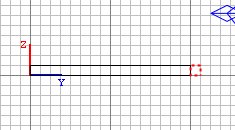
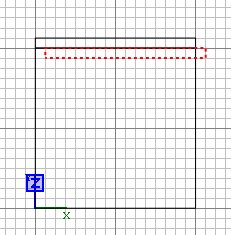
Ok we have a floor, let's add a wall.

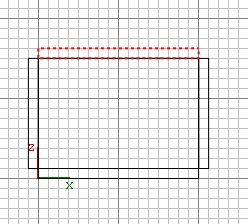
In the 2D view make sure we have the top down view, and draw a rectangle next to one side of the floor.  Don't worry about whatever texture gets used at the moment.

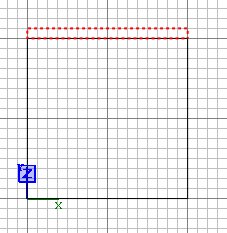
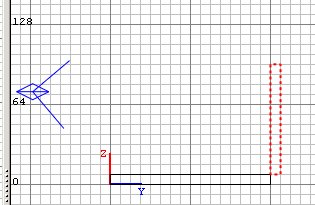
Press ctrl+tab twice so we are looking down the length of the (currently very short) wall.

Lift it so that the bottom edge of the wall touches the top edge of the floor. (Click inside the selected area and drag up).

Make the wall higher by putting the cursor above the selected area and dragging upwards.

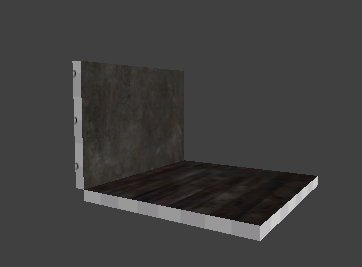
Ok we have a serviceable wall.  Now caulk it.    and press ESC to deselect the brush.

As we are going to see only the inside of the room, we only need to texture the inner wall.

I am going to use a drab stone effect: click Textures, Town, Town Wall.  We get the town wall textures shown.

In the 3D window, select the inner wall face (ctrl+shift+click) and click on texture town_c61a and press ESC to deselect the face.

Now make sure the 2D is topdown, and select the wall brush (shift+click).

To duplicate a selection: press SPACE BAR.

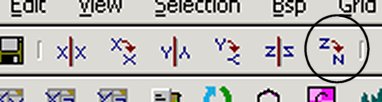
We want to rotate the new wall 90 degrees around the Z axis.  Press the button shown, to do this.

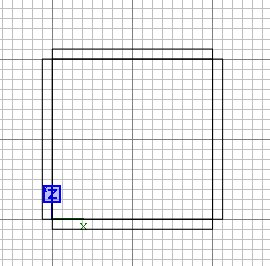
In the 2D window, drag the newly rotated wall against the right edge of the floor.

Duplicate the new wall, rotate 90 degrees again, and drag it to the bottom edge of the floor.

Duplicate the new wall, rotate 90 degrees again, and drag it to the left  edge of the floor.

Press ESC to deselect.


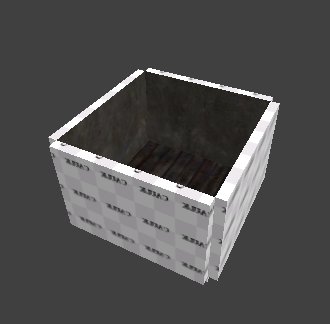
Now we just need a ceiling.

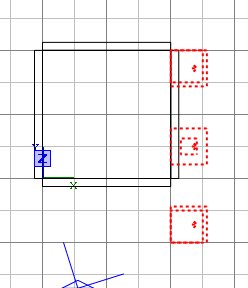
Be aware that in the 2D view when you try to select a brush, Radiant will select the uppermost brush you click on, if there is more than one under your cursor.  This can be misleading, as you can believe you have selected the floor when actually you have selected the ceiling.  Another method of selecting is to repeatedly use shift+alt+click, which will drill down through each brush under your cursor, selecting one after the other.

Select the floor, press ctrl+tab to get a side 2D view, and duplicate the floor.  Move it to the top of the walls, then caulk it.

Deselect it.  Move your 3D viewpoint inside the room and look at the ceiling face - select it with crtl+shift+click.  We'll give it a sky effect.  Sky textures provide light, so we won't need to put explicit light sources in the room.

Click Textures/Fueldump and pick the FuelDumpSky texture.

Deselect the face - you have made a small room with a sky ceiling.

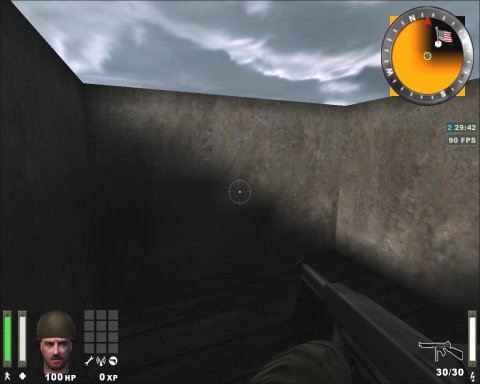
We will put the player inside the room.  He will only be able to see the inside of the room.  The sky is actually a ceiling.  Everything outside the room is in the volume space called void.  You must ensure when making a map that the player could never trace a path to the void.  That is, the 3D space that encloses the players must be airtight, with no gaps that lead to the void, even if a player could never see it.  If you do, your map compile will fail with a "Map is leaked" error msg.
Placing the player start points [Top]
You need to include a minimum of 6 particular entities before a map can function.  An entity is a game component other than an ordinary brush, but you can convert brushes into special purpose entities which you'll see later on.

To save the time involved in inserting them, download (right-click) this players.zip file which has them already defined.  Extract the players.map inside and put it into your \maps folder.

To include the contents of that file into your map, click File/Import and select "players.map".  The 6 entities arrive in your map, already selected.

Deselect them, then select each in turn and move them inside the room.  Do not have any part of an entity sticking into a wall, floor or ceiling, as if you do the map compile will fail with the "Map is leaked" error.

This is a little cramped with this tiny example room; with a large map there is plenty of space :)


The entities you have just placed are:
 
Blue box Allied player spawn point - you need 32 of these per Allied spawn location.  One will do for testing.
Red box Axis player spawn point - you need 32 of these per Axis spawn location.  One will do for testing.
Yellow box near the blue box  The clickable flag for the allies spawn point shown on the command map - one per spawn location
Yellow box near the red box The clickable flag for the axis spawn point shown on the command map - one per spawn location
Large mauve box Viewpoint within map until player selects a team
Small mauve box The entity that connects to your script - you need exactly one of these in a map

Defining the world co-ordinates [Top]
You need to tell ET how big your map is now, so that it can position the icons on the command map in the right place.

Select any ordinary brush, like the ceiling brush.  Don't select an entity such as a player spawn point at this time, as to access the worldspawn values you have to have an ordinary brush selected.

Press N.  This brings up the Entities window.

You'll see the worldspawn entity.  You would see this for any regular brush you had selected, it's just a way to set worldspawn values which tell ET some basic map stats.  Enter "mapcoordsmins" as a Key, and "0 128" as the Value and press return.  This is the top left co-ordinate of your map.

Then enter "mapcoordsmaxs" as a Key, and "128 0" as the Value and press return.  This is the bottom right.  The mins and maxs must define a square, regardless of the actual shape of your map.

Close the entity window and press ESC to deselect the brush.

Compiling the map [Top]
It's about time you saved the map to disk.  Do a file save - I am using the name "tutorial" for this map example.  Ensure the file is saved into your \maps folder.
Save your work often.  It's very painful to have to redo a lot of creative work if Radiant crashes (which it might) or you have a power cut.  I also save my work after a fair amount of work to a copy of the map, eg tutorial_051124a.map, tutorial_051124b.map, etc.  Sometimes an error might creep in and you'll need to recover to a map file a few versions earlier.

Click BSP menu item and pick the longest compile option, the one that starts Simulate old style.

3 DOS windows will open one after the other, and you will see a mirror of their output whizz past in the Radiant output window.

When the compiles finish the last lines will say Disconnecting and Connection closed.

If you haven't made an error and your compile worked, you now have a tutorial.bsp file created in the \maps folder.

Testing the map [Top]
You will need to add a couple of parameters to the startup for ET.  Add the text "+set g_gametype 2 +set sv_pure 0" to the target string.  If you are copying from this web page, paste the text into a flat .txt file then copy and paste into your shortcut from there.  Otherwise you may paste some non-printable chars which will stop them from working within your shortcut.  The symptom for that would be ET being unable to find your map when you try to test it, when you know it is there.

Run ET, and when the game comes up press ESC and go into the console (tilde key).  Type "\devmap tutorial" - if you didn't use tutorial as the map name, use your map name in place of "tutorial".

Revel in being able to run around in your own (very tiny) map!  Don't worry about the command map, it will only be a large black area edged in orange for now.

Back to the main menu