2Bit's Mapping Corner on www.PythonOnline.co.uk
ET Mapping Tutorial

Lesson 6

Topics

Making a door
 
Making a door frame
Making a door
Back to main menu
Making a door frame [Top]
Run Radiant.  Open the tutorial map.  Select the environment ceiling and Hide it.  Select the roof over the doorway and Hide it too.

The default 4 grid size is fine this time.  Look at the doorway in the overhead view and select one of the doorway walls.  Drag the wall 1 notch sideways to make the door opening a little larger.  Do the same with the opposite wall.  Make sure you deselect after each wall adjustment.

Then select the wall above the opening and stretch it both ways to meet the receded side walls.

Press ctrl+tab to see the side view, so you can shrink the wall over the door upward a little.  We have now made a space all the way round the doorway to accommodate a door frame.

Press ESC.  Select in the 3D view all the wood effect faces in the current door frame, and click the Caulk texture in the textures window.

Press ESC.  Now we will create a door frame, by creating brushes in the usual way.

Ctrl+tab until you get the overhead view.  Then create a brush in the doorway as shown.

Ctrl+tab.

Move the brush down a couple of notches.

Stretch the brush down to the floor.

Zoom in for close up work, and angle the top part of the brush using the Edge tool.

Press 3.

Ctrl+tab again, and drag in the lower of the side blue dots one notch, as indicated, for both sides:

After you have dragged the two blue dots, one after the other, you get a nicely bevelled door frame side piece:

You'll see this clearly in the 3D view.  Press ESC, then select the 3 main faces of the new brush, not the tiny upper one.

Click on the wood_c01 texture in the textures window and press ESC.

Get the overhead view via ctrl+tab if needed.  Press 4.  Select the new brush.

Duplicate it, and click the "x-axis flip" button then move the brush to the opposite wall edge.

Ctrl+tab.  Duplicate the brush.  Click the "y-axis rotate" button 3 times and move the brush into place as shown.

Shrink it to size.

Then use the Edge tool to get its edge to line up at 45 degrees.

Press ESC, and select all 3 visible faces of this brush.  Press S.  Click the up arrow to rotate the textures through 90 degrees.  Click Done.  Press ESC.

You've made the door frame.

Making a door [Top]
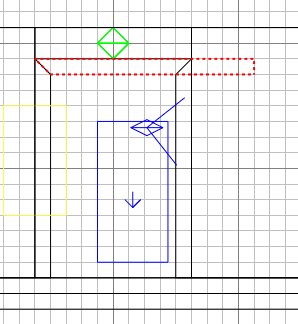
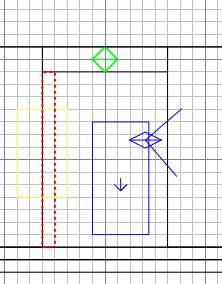
Get the overhead view.  Press 3.  
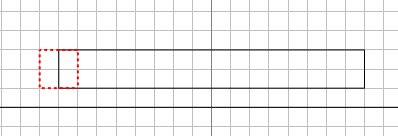
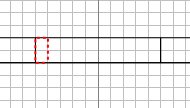
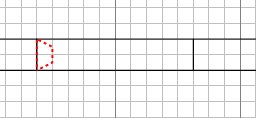
Create a brush as shown, and caulk it.

Ctrl+tab, and drag the brush into the door opening.

Resize it to fill the doorway.  
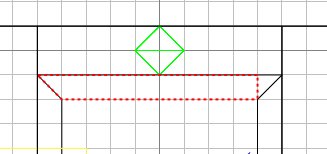
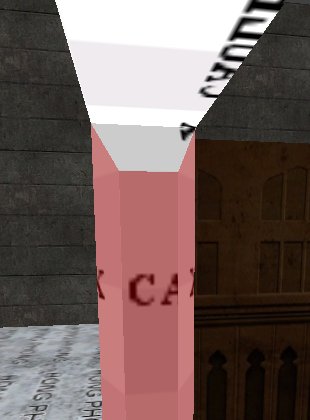
Press ESC.  Hide the door frames and walls that surround the door frames, so we can see our door properly.

Select the 3 door edge faces, and apply the wood_c01 texture.  Press ESC.  
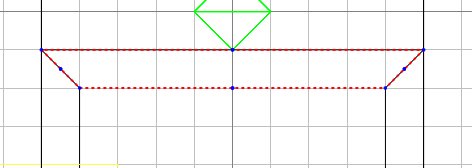
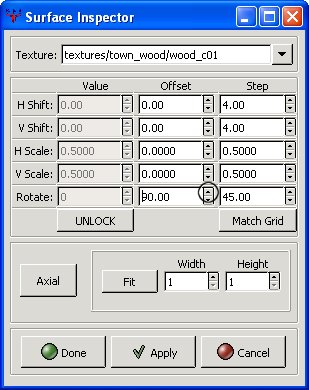
Reselect the top face, press S, and rotate the texture through 90 degrees.  Press ESC.

Select both of the main door faces, and click Textures/doors and click the door_c01b texture.  The door will look a muddle; don't worry.  There are lots of door textures, but most of them are scattered about, rather than in the doors folder :(

Press S.  Click "Fit".  Click Done.  Press ESC.

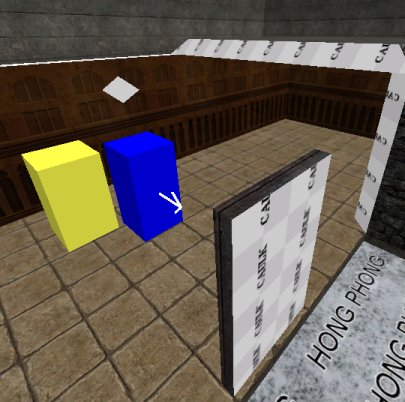
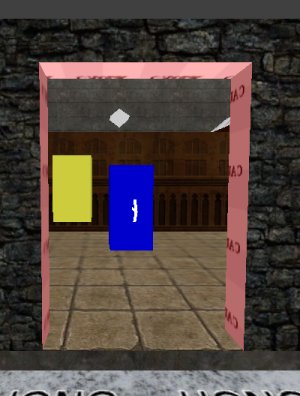
We have our door (non-functioning at the mo).  Note that the door texture is mirrored on the reverse face, which is handy as it will keep the handle/hinges in the right place.  Textures are always reversed on opposite edges.

Now to make the door work.

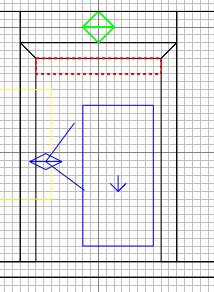
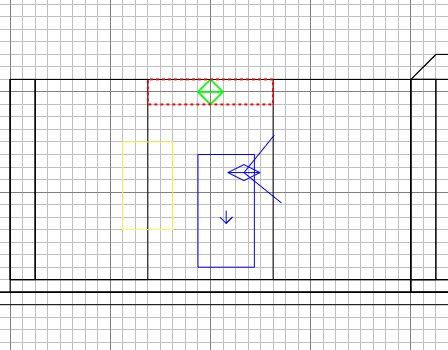
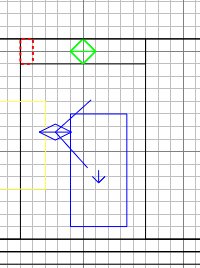
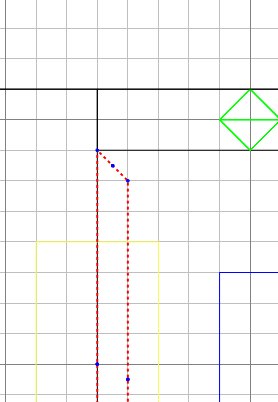
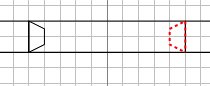
Get the overhead view, and draw a brush as shown (yes it overlaps).  It will define the hinged side.

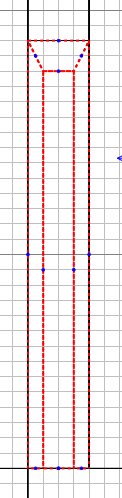
Get a side view.  Adjust the brush to be the same height as the door.

Click Textures/common and click the Origin texture (orange check pattern).

Now select the door, so that it and the origin brush are both selected.

In the 2D window, right click and select "func" then "func_door_rotating".

Press N.  Enter "type" as a key and "4" as a value and press return.  Close the entities window.

We have an operational door, but there is one more thing we need to do, otherwise the compile will fail.

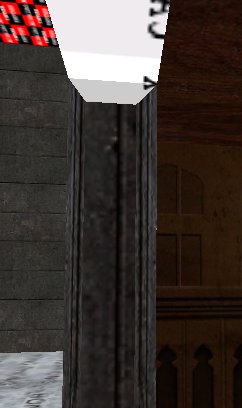
Press ESC and shift+H to reveal all the hidden brushes.

Select the 3 door frame brushes, then in the 2D window right click and select  "Make Detail".  This is because entities, such as an origin brush, cannot fall within a structural brush (such as all the walls made so far) but it's ok to fall within a detail brush (to be explained later).

You're all done.  Save the work, compile and test.  Don't worry, it isn't always this long-winded.  Once you've made something like a door, you make it into a prefab (explained later) and then you can just plonk copies of it into place as and when you want.
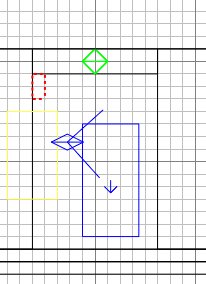
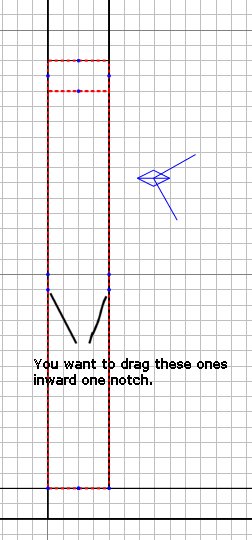
To select the door entity, use shift+alt+click on any component brush, and the whole assembly gets selected.  To select a component brush of an entity made up of several brushes, just use the regular shift+click.
Next lesson