2Bit's Mapping Corner on www.PythonOnline.co.uk TibeT Clan | ClanBar.com
ET Mapping Tutorial

Lesson 11

Topics

Planting a tree
 
Introduction to models
Making some ceiling space
Putting a tree model into place
Making a tree prefab
Back to main menu
Introduction to models [Top]
What's a model?  It's a predefined object that you can plonk straight into your map, without having to make or paint any brushes.  Just like putting a ready-made MG42 into the map, we can put in any ready-made models we want, things like trucks, tanks, trees, vases...

For Radiant to see a model to give you the option of picking it, it has to be within your ET folder structure, rather than just in a PK3.  When Radiant installs, it creates the models folder within etmain, and the mapobjects folder within models.  Inside there are a load of folders each of which contain model files, ending in .MD3.

Models are great ways to include some graphical detail without having to do any work. :)

Apart from a bit.  Models are drawn by the game, but do not affect player or missile movement.  So if you put a tree model into place and leave it at that, the players would be able to run clean through it.  You'll see how you can stop that further down in this lesson.

Making some ceiling space [Top]
Trees are tall.  In our little space we need to raise the ceiling.  This should also prevent the "grenades-through-the-sky" syndrome.  If you find you can still manage to get a grenade through the sky, you could lift the ceiling higher again until you can't.

Run Radiant and open the map.  Ctrl+tab to see the side view.  Select the sky brush, and move it down until it sits on the 256 Z line.  We're doing this to get the brush dimensions to fit nicely into a very large grid size.

Press ESC.  Select the 4 walls, and decrease their height to meet the ceiling.

Press 9 for a nice big grid size.  Duplicate the four walls.  Move them onto the top of the other walls.

Press ESC.  Select the sky again, and move it up one notch.

Press ESC.  Now select all the inner wall faces of the new high walls we just built, and finally select the sky face too.  You should have 5 faces selected, and the sky one must be the last.  Why did we select the sky face?  Because it's a handy way of getting the sky texture visible in the textures window.  Click it now and it will apply sky texture to all the selected faces.  Press ESC.

Putting a tree model into place [Top]
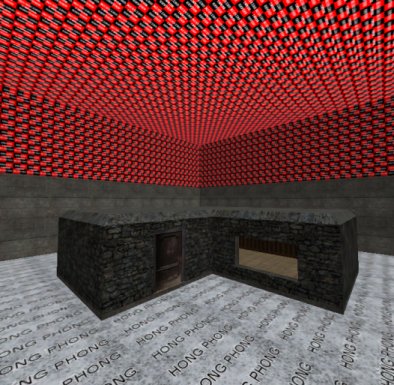
Get the overhead view.  Press 5 to get a reasonable grid scale.  Right click where shown here:

Click misc/misc_model and a window will open.  Double-click mapobjects then trees_sd, then tree_a.md3.

Get a side view, and move the tree down to the ground by click/dragging somewhere within the actual tree shape, rather than just somewhere within the box it comes in.

Maybe it's a little too big.  Press N and enter a key of "modelscale" and a value of "0.8" and press return.

Ok the tree is about the right size, now we must add a "clip" brush, which is a brush that isn't drawn, but will act as the solid tree trunk to block movement, and also to give a wooden bullet ricochet noise if the clip brush is hit.

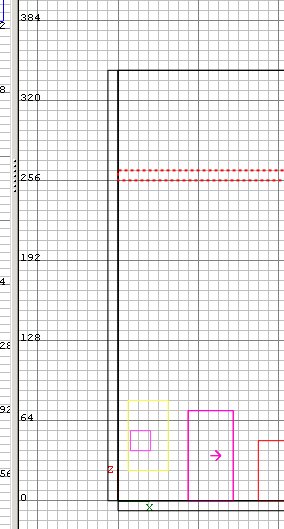
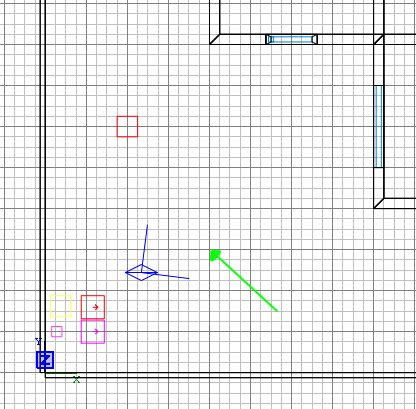
Press ESC.  Get the overhead view and draw a brush as shown.

Then select Region/Set Tall Brush from the menu at the top of the screen.  This restricts what Radiant draws to whatever is inside the box you drew.  The box is deleted as it has fulfillled its task of indicating the area you are interested in.

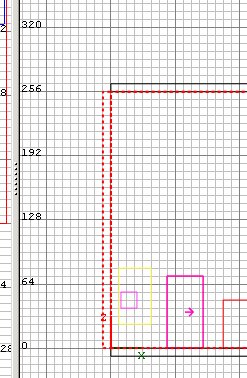
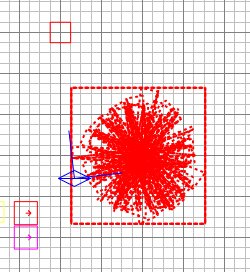
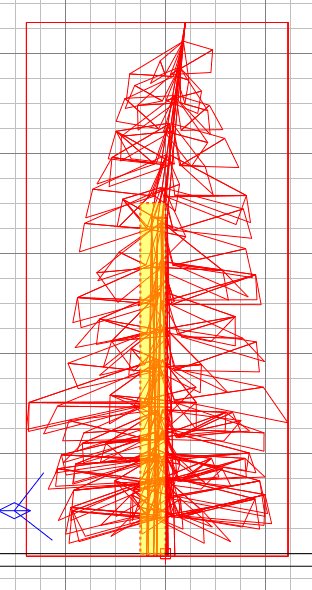
Get a side view and draw a brush as shown.  I've coloured it yellow so you can see the red dashed outline against the red model.

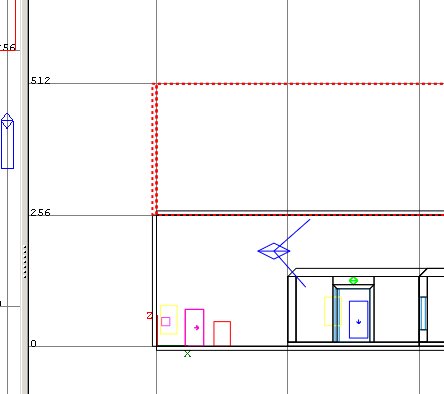
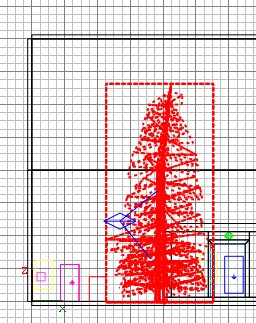
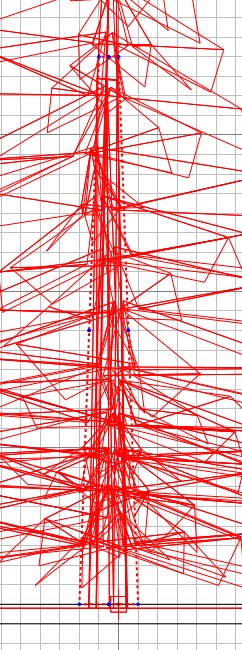
Get the next side view, and shrink the brush to about the right size by pressing 4 to get a better grid scale..

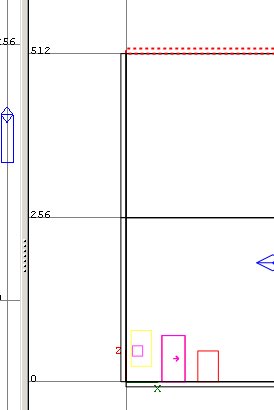
Once the brush is about right, but a bit lumpy and straight upright, use the Edge tool and grab the corner blue dots to make the brush hug the tree trunk up to about the point where you no longer need clipping, ie up high in the leaves.

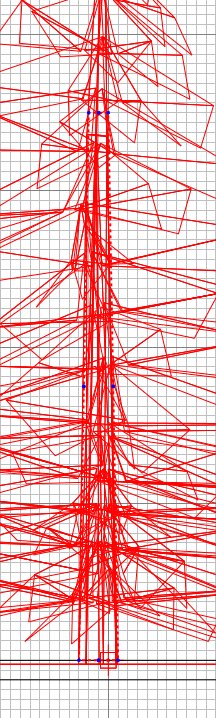
Keep using ctrl+tab to check the 2 side views as you refine the clip brush.  Use 3 if you want to get the fit really snug.  You can see in the 3D how you are doing.


Press E when you are satisfied with it.  Then click Textures/common and click on the Clip Weapon Wood (green/mauve check) texture.  Finally right-click in the 2D and select Make Detail.  This deselects the brush too.

Ctrl+tab to get the overhead view.  Press 7 to return to a sensible grid scale.  Click Region/Off to see the whole map again.  Save your work.

Making a tree prefab [Top]
Happily you won't have to do that for every tree.

Make a folder called "prefabs" in your maps folder.

Select the tree model and its clip, either by clicking them both (fiddly) or by drawing a box around them and "selecting complete tall".

Click File/Save Selected... then double-click the prefabs folder, give a file name of say "snowy_tree_1" and save it as a .map file type.  Press ESC.

You can save any collection of brushes as a prefab.  This is hugely helpful, as it means you can import prefabs as you need, without having to reinvent every little detail.
To include a prefab into your map, you click File/Import... and navigate to the prefab you want.  It will appear within your map, at the co-ordinates that it was saved at, and already selected ready for you to move into place.  When moving a model/clip like this, be sure to put your cursor within the clip area, or you may distort the clip by accident.

If you change the modelscale of your tree later on, be sure to change the size of the clip brush too.  More on that later.

To make a little clump of trees it is best to make a few prefabs using different trees and different scales, and then import a variety so they don't all look the same.

Compile and test to make sure your tree is ok.  Notice how the wall and ceiling sky textures are seamlessly merged by the game engine.  Neat.  And your tree model casts a plausible shadow.  Very neat.

Next lesson