If it isn't clear how far you need to
drag the vertex, you can briefly select the
door or the floor so you can see the
required baseline, but you will need to
press V again.
Drag the vertex down to the required
baseline.
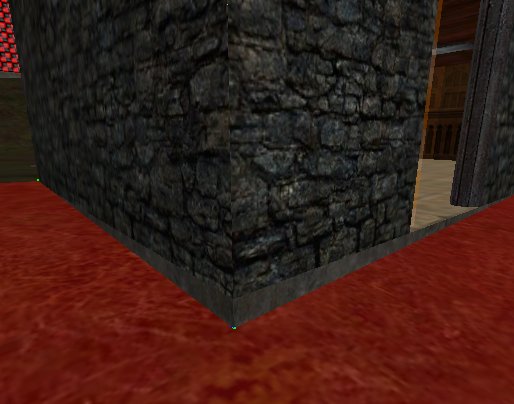
In the 3D view this now appears
that the terrain is out of the way.
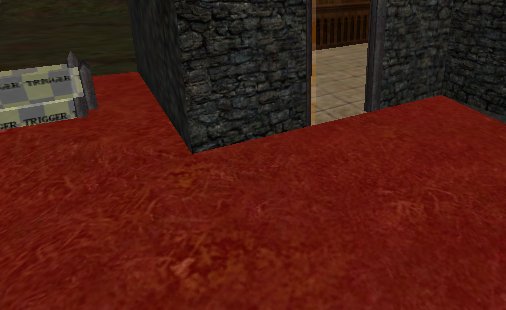
Check it by going inside the building,
selecting the door and hiding it.
As you can see, there is still some caulk
showing, so we need to drag another
vertex down too. But this time it is
slightly more involved, and in fact is much
more the usual state of affairs, being that
we'll need to drag multiple vertices at the
same time.
Take your 3D view outside again.
Get the 2D overhead view. In the 3D
view (it is easiest unless you hide the sky
to make 2D selection easy) select all of the
triangles that share the vertex at the
corner of the building. There are 6
triangles to select.
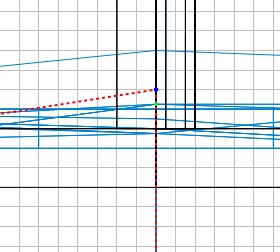
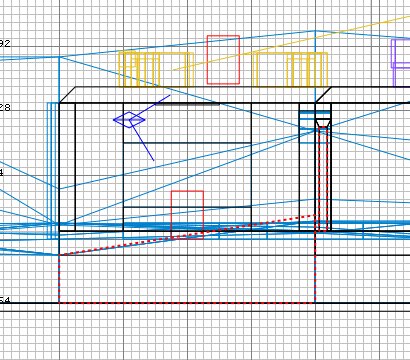
This is what the 2D view should show:
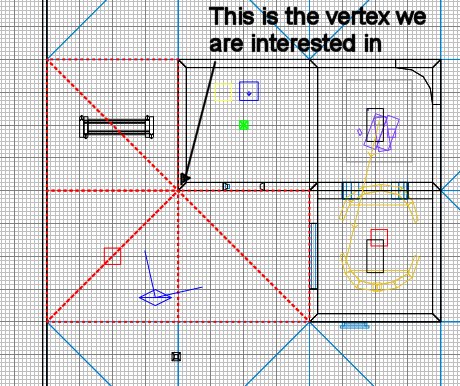
Press V and select the required vertex -
this gets quite hard in 2D but sometimes
with the rolling hills it can be impossible
in 3D so even the quite hard 2D view is
easier :(
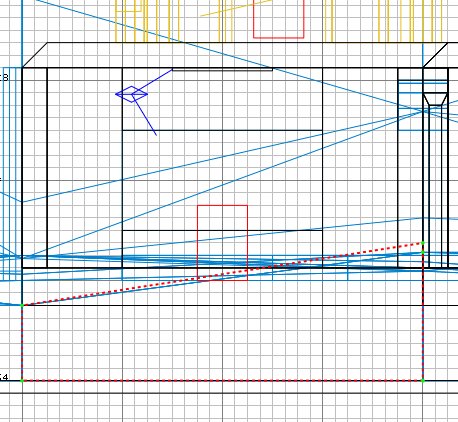
As can be seen, the required vertex is
not grid aligned. As we are at grid
scale 4 and the dot is clearly 1/4 up from a
line, we'll need to drop down 2 scales:
press 2 to get grid scale 2.
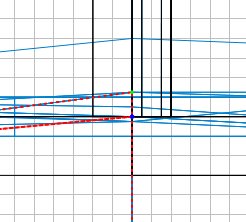
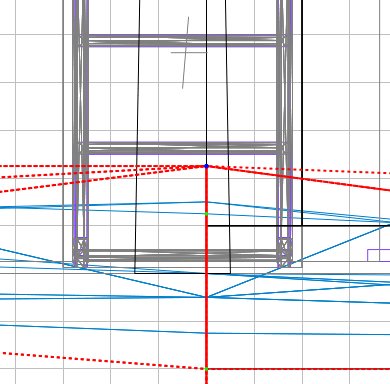
Ok now we have the required scale, but it
has become hard to see where we have to drag
it. The best thing is to drag it just
enough to put it onto a bigger, better grid
scale. So drag it one notch down, then
press 4 to go back to grid scale 4.
Drag it down a couple of notches, and it
should look like this:

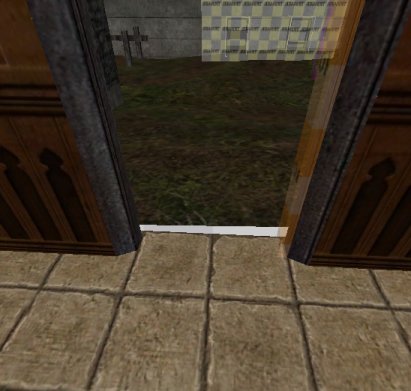
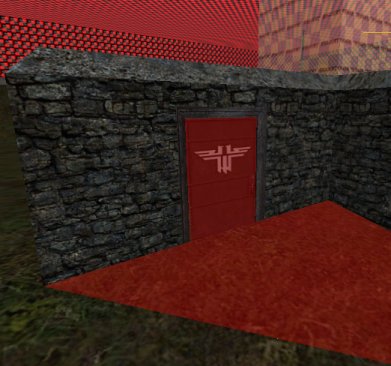
Press ESC to let go of all the
brushes. You can see now that the door
is unobscured, so you can reveal the door
again.
 When
you edit your terrain mesh this way, Radiant may well generate duplicate
planes, which will cause your compilation to open the debug window. So
after each editing session and before you compile, you should click the
Brush Cleanup When
you edit your terrain mesh this way, Radiant may well generate duplicate
planes, which will cause your compilation to open the debug window. So
after each editing session and before you compile, you should click the
Brush Cleanup  button. If it finds errors it deletes them and tells you how many
invalid planes were removed. it also selects the mesh group. You
should deselect the group and click the button again until the Brush Cleanup reports
0 invalid/duplicate planes removed. Finally deselect the group and
save your work.
button. If it finds errors it deletes them and tells you how many
invalid planes were removed. it also selects the mesh group. You
should deselect the group and click the button again until the Brush Cleanup reports
0 invalid/duplicate planes removed. Finally deselect the group and
save your work.
|
|
There
will be occasions where the vertex you wish to manipulate shares its Z
co-ordinate with another vertex of one or more of the selected triangles
(ie, that point of the triangle shares its height with other points on the
selected triangles). In the 2D view you will not always be able to see
the other vertices at the same height as they may be obscuring each other
depending on whether you are looking down the X or Y axis at them.
When you try to select and drag the vertex, you may find you are dragging
the wrong vertex :(
This is because even though you may have selected the right vertex in the
3D view, when you click on the blue dot in the 2D view, Radiant will realize
that there is another vertex at that point which is closer to you, the
viewer, and so handily selects that one for you. You may notice this
has happened in the 3D view - but if you don't, you're going to start
dragging the wrong vertices. Watch out for this. If you find
this happening, try using the other 2D side view. Or selecting the
other troublesome triangles and move their offending vertex up/down a little
to get it out of the way. Final option is to carefully drag a notch
up/down in the 3D view - this is hazardous as it is easy to accidentally
drag sideways.
|
Final tip is to remind you to get down to
the lowest grid scale needed to get your
vertex onto a grid intersection. Then
move it to a nearby larger scale grid intersection, change the grid scale up
accordingly by pressing a bigger number,
even 9 if possible, then zoom out in the 2D
view and drag in larger increments.
Always try to leave any dragged vertices on
nice big grid intersections, it will help
you a lot.
Do not drag vertices sideways in the 2D
view, only up and down!!!!
|