2Bit's Mapping Corner on www.PythonOnline.co.uk
ET Mapping Tutorial

Lesson 32

Topics

Limbo camera and objectives narrative
 
Placing limbo cameras
Scripting the objectives
Writing the objective descriptions
Back to main menu
Placing limbo cameras [Top]
We've reached the final set of lessons needed to reach the point where you can create and distribute a fully operational PK3.

This lesson covers the use of limbo cameras, which are the little (dynamic) images that accompany the objectives text on the limbo screen.  With the views, those blocks of  text, and the tickes and crosses you can superimpose on them, this part of the limbo screen tells the players what to do, the order to do it in and roughly where to do it.

I'm not actually sure how many players ever look at this information, whether they are brand new to the map and could use the instructions, or whether they are familiar with the map and need to know which objectives have been accomplished - but you have to provide this information or you get some ugly default views in the limbo camera section.

The components to providing limbo camera information are:

  • the limbo cameras placed in the map
  • the script which associates each camera to an objective
  • the script which dynamically puts ticks and crosses on the objective text
  • the descriptive text which accompanies the views

We'll start with the camera placement.

Run Radiant and open the map.

You are limited to 8 objectives.  Along with the general introduction limbo camera view, this gives you a total of 9 limbo cameras available to you.

We will place 2 cameras and assume there is one objective - for the allies to destroy the main gate.

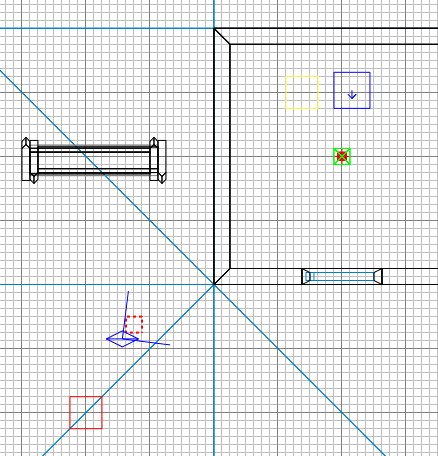
The first camera will show the general view which introduces the map.  In the 3D view, place the view where you want the camera to be looking from, and aim the view in the direction you want it to be looking in.

In the 2D view, position the overhead view so you can see the little blue eyeball indicator.  I've picked a general view, just above the roof height, that offers a far view of the gate.

Right-click just in front of the eyeball and select info/info_limbo_camera.

Now in the 2D view, adjust the height of the camera until it is just in front of the view in 3D.

Press N.

Enter objective and give it a value of 0.

Enter target and a value of limbo0

Press ESC.

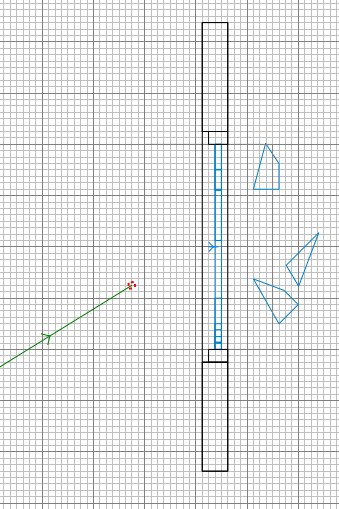
We must now place an indicator over in front of the gate to tell the camera what to look at.

Right-click in front of the gate and select info/info_notnull.

In the side view, move the info_notnull to a height about the middle of the gate.

Press N.

Enter targetname with a value of limbo0.

If you have done this correctly, the camera will now join to the info_notnull with a green line.

Press ESC.

Now we'll place the second camera - it will show a close-up view of the objective, ie the gate.  Get a close view in 3D and place and position another limbo camera entity as you did before.

Press N.

Enter objective and give it a value of 1.  This is the first of a possible 8 objectives.

Enter target and a value of limbo1.

Press ESC.

Place another info_notnull in front of the gate.

Press N.

Enter targetname with a value of limbo1.

If you have done this correctly, the camera will now join to the info_notnull with a green line.

Save and compile the map.  Don't run ET yet.

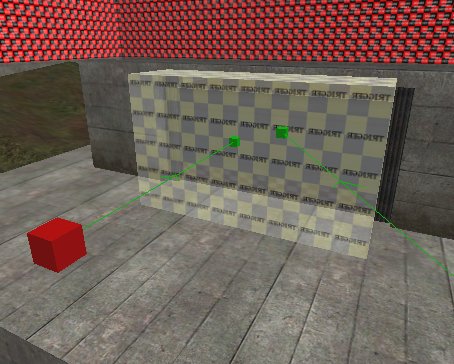
Remember that these are dynamic cameras, and will show the view at the moment the player is looking at it.  Bear that in mind if your view looks wrong or inappropriate if the game circumstances change.  Don't worry too much though, as I said, I doubt many people look at them :(

Scripting the objectives [Top]
Open etmain/maps/tutorial.script.

Add this line into the game_manager spawn trigger, after the line wm_set_round_timelimit

  • wm_number_of_objectives 1

This number will be a value between 1 and 8, depending on the number of declared objectives.  You can have more than 8 objectives, but you can only have limbo cameras for 8 of them.

Add these lines into the same trigger, after the wait 500:

  • // Objectives
  • // 1 Primary Objective: Allies destroy main entrance

These are just comments, to help remind you what the following instructions are actually referring to.

Add these lines below those just entered:

  • // obj nbr, team, status (0=none, 1=passed, 2=failed)
  • wm_objective_status 1 0 0
  • wm_objective_status 1 1 0

These lines set the starting conditions for each objective.  You would have 1 pair of these lines per objective.  This is what the lines mean:

wm_objective_status 1 0 0 The instruction that sets the status for an objective
wm_objective_status 1 0 0 The objective number
wm_objective_status 1 0 0 The team number - 0=axis 1=allies
wm_objective_status 1 0 0 The status - 0=unmarked 1=ticked 2=crossed
Fiinally add these lines to the gate death trigger, it doesn't matter where precisely:
  • wm_objective_status 1 0 2
  • wm_objective_status 1 1 1

So when the gate is blown, the axis objective is marked with a cross, and the allied with a tick.  If the objective you were marking in this way were say a flag, which could be expected to switch back and forth, you can repeatedly set the objective status to show a team a tick, then a cross, then a tick, etc.

That's the end of the script changes.  To finish we now just need to create the text to go with the limbo views.

Writing the objective descriptions [Top]
The descriptions are written in a new text file.

Create a text file called etmain/maps/tutorial.objdata.

Edit the tutorial.objdata file, and add these lines to it:

// Set scenario information

wm_mapdescription allied "Destroy the main entrance!**Run through the opening and laugh madly!"

wm_mapdescription axis "Don't let them destroy the main entrance!"

wm_mapdescription neutral "The Allies must blow the main gate."

// Axis Objective Descriptions

wm_objective_axis_desc 1 "Primary Objective:**Don't let them destroy the main entrance.**This will lose the forward bunker and give them access to the factory."

// Allied Objective Descriptions

wm_objective_allied_desc 1 "Primary Objective:**Destroy the main entrance.**This will capture the forward bunker and give you access to the factory."

The first three lines of text give the general map objectives display to spectators, axis players and allied players, before they look at any of the objective limbo camera views.  In limbo this will appear as objective 1 of 2.

The axis and allied specific descriptions are numbered 1, and you'd have one line per objective, obviously numbered 2, 3, 4, etc.  Make sure these match up with what you do in the script!  I have used the text from 110 Factory to illustrate the sort of thing you might put.

Generally you should make Primary Objective those objectives that are critical to game success, and the others merely Secondary Objective.

You can use * to force a new line, and ** to force a new paragraph.

Run ET and revel in your limbo views and objective text :)

You'll most likely find that some views are slightly wrong or poorly illuminated, so it is an iterative exercise of tweaking camera positions until you are happy with all of them.

Next lesson