|
Textures - what's that all about then?
A texture is the name given to the
image applied to the face of a brush.
A brush typically has 6 faces, all of
which will have a texture applied. At
the simplest level a texture on a face will
be a JPG or TGA file of anything from a
single colour up to an image of the Mona
Lisa. Some special textures are used
for the faces that don't need to be drawn,
for example where two faces are flush
against each other, or a face faces away
from any player and will never be seen (and
so need not have a visible texture applied
to it). One special texture for this
purpose is called Caulk. Faces with
caulk on them are not drawn, and so must
never be somewhere that a player could look
at it. You've probably played a map
where a caulked face is accidentally
visible, and you get a weird hall of mirrors
effect while you look at it. So you
must ensure all caulked faces cannot be
seen. In making a map you should be trying
to achieve your design aims using the least
number of brushes and the least number of
visible faces as possible. One way to
achieve the latter is to create your brushes
initially entirely from the caulk
texture. Then you "paint"
the visible faces with the required texture,
safe in the knowledge that all the other
faces are caulked. For example, say you
created a brush to be used as floor in a
room. You decide to make the whole
brush a wood texture and you slot the brush
into place. You forget to later caulk
the bits you can no longer see, so you end
up with 5 other faces that the engine must
consider when deciding what to draw, when if
they had all been caulk it would not present
this overhead. It may seem like small
fry, but a map like 2tanks has 8,000
brushes, and so about 48,000 faces, which
translates to around 96,000 triangles to be
considered and possibly drawn. As you
want to try to keep the maximum number of
triangles drawn to under perhaps 40,000 you
need to ensure you use caulk wherever
possible. So let's start correctly
with the flat square we've created.
We're going to make that the floor. We
caulk an entire brush by selecting the brush
and clicking the Caulk button. 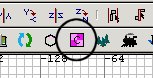 Textures
are applied in the 3D window. Point at
the top face of the flat square and press
ctrl+shift+click. (To cancel the face
selection, press ESC. You can select
multiple faces by pointing at more faces one
at a time and ctrl+shift+click them into the
selection. You can also deselect a
selected face in the same way.) 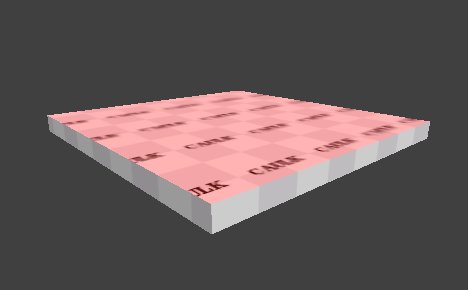
Now
we need to tell Radiant what texture to
apply.
 At this stage it is unimportant that your \etmain folder
contains extra PK3 files, like custom
maps. But as you get deeper into the
mapping it becomes important that your
\etmain folder doe not have them. Radiant will show you the
textures in those PK3s as available for you
to choose. And you will not realize that the town you have
lovingly created uses 25 textures scattered
across lots of other PK3s, and because they
won't be in your PK3 when you proudly
distribute your new map, everyone else will
see the ugly yellow/black squares texture
all over the place - oops :(
At this stage it is unimportant that your \etmain folder
contains extra PK3 files, like custom
maps. But as you get deeper into the
mapping it becomes important that your
\etmain folder doe not have them. Radiant will show you the
textures in those PK3s as available for you
to choose. And you will not realize that the town you have
lovingly created uses 25 textures scattered
across lots of other PK3s, and because they
won't be in your PK3 when you proudly
distribute your new map, everyone else will
see the ugly yellow/black squares texture
all over the place - oops :(
|
Click the "textures" menu
item. You can now choose to see the
textures available under the various folder
names. It's a bit of trial and error
here as you go looking for the texture you'd
like. For now choose Wood. All
the textures in the folder will now show in
your textures window. Don't worry
about those that show as red/black squares.
Click on one you like; I am using
wood_m05a_usata.
Ok, we've created a floor!
Next lesson
|