 |
ET Mapping Tutorial Lesson
4 |
|
|
|
|
By managing to achieve a fully workable,
albeit tiny, map in the previous lesson, you
have actually got over a significant
hurdle. Much of what follows will be
easy to assimilate now that you have
acquired the knowledge to get the guts of a
map working.
Our first room was tiny. We will
expand it to something rather larger,
convert it into an "outside"
environment to contain some buildings, and
then make a building to put in it. At
the end of this second tutorial you'll be
able to run around inside and outside a
building that contains a few rooms.
|
|
Run Radiant if you haven't
already.
Open the tutorial.map.
 You
may have spotted on the Preferences tabs that you can get Radiant to open
the last map you were working on. Don't do it. You can mangle
your map so that it causes Radiant to crash on opening it, and if it's set
to open it on startup it can get confusing and tiresome trying to sort it
out. You
may have spotted on the Preferences tabs that you can get Radiant to open
the last map you were working on. Don't do it. You can mangle
your map so that it causes Radiant to crash on opening it, and if it's set
to open it on startup it can get confusing and tiresome trying to sort it
out.
|
|
|
You will notice that the textures window
shows by default all the textures used in
your map. As you get more and more
textures in your map, that list will get
longer. This brings a useful editor
feature into use: Click Textures/Textures
Window Scale and select 25%. That way
you can see more textures more easily.
There will be times though that you can't
easily read the texture names because the
text is overlapped with the next
texture. Set the scale to 100% or 200%
to overcome that. In other words, set
the scale to whatever you are comfortable
with and that meets your needs.
Let's make this tiny room into a large
outdoor container for a building we will
then
create inside it.
|
It might be quicker to start afresh with making a large cubic space - but we
will instead transform our tiny room into the large volume because it
demonstrates a number of handy techniques, including hiding, revealing and
deleting brushes, plus manipulating multiple brushes simultaneously.
|
In the 2D window, top down view,
shift+alt+click on the ceiling of your room,
twice. This will end up selecting the floor
(yes!)
as you will easily verify by either
pressing ctrl+tab or looking in the 3D view.
Still in the overhead 2D view,
shift+click on the ceiling area again.
This will add the ceiling to your selection
set, ie you now have the ceiling and floor
selected.
Press 8 to get a nice big grid scale.
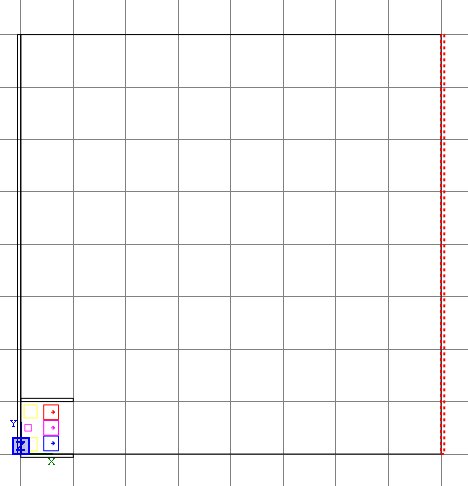
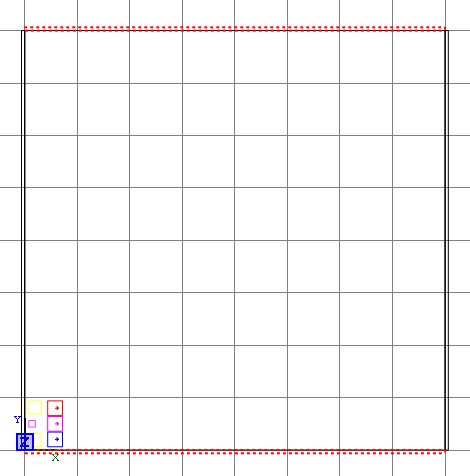
In the 2D view, click outside the
selected area in the upper part of the
window, and drag the selection larger in
that direction, until the selection reaches
the 1024 Y-axis mark.
|
|
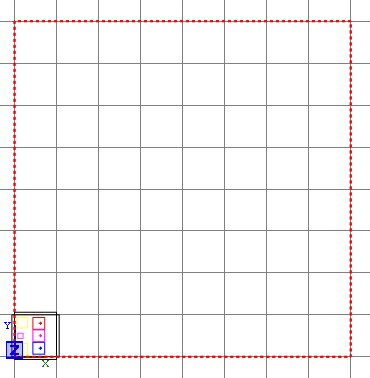
Now click in the 2D window to the right of
the selection and drag it to the right,
making the selection a square of dimension
1024*1024.
|
|
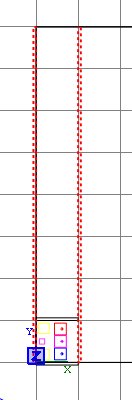
Deselect the brushes. Now we want to
stretch the walls to match. Put the
cursor over the right hand wall in the 2D
window and press shift+alt+click
twice. The first click will select the
ceiling, but the second will select the wall
that we want.
Then shift+click the left hand wall, so
now we have both side walls selected.
Put the cursor above and between them and
drag upwards until they are 1024 long.
|
|
Press ESC. We want to move that right
hand wall over to the far right, but the
ceiling is in the way and the
shift+alt+click is a little tiresome, so
we'll employ another technique to make it
easier.
Select the ceiling. Press H
to hide the selection. Now we
can get at the walls without always having
to drill down through the ceiling.
Select the right hand wall. Put the
cursor within it in the 2D window and move
it over to the far right.
Press ESC - select the remaining 2 short
walls and delete them by pressing
BACKSPACE. (If you accidentally
select say the floor when trying to select a
wall, just repeat the click and the wrongly
selected brush will get deselected again.)
Now select the 2 big walls - the quickest
way here is probably to click on them
directly in the 3D window.
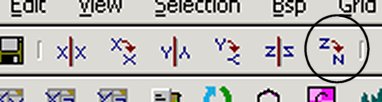
Duplicate them by pressing the Space Bar,
then rotate them through 90 degrees by
pressing the key shown in the picture:
Put your cursor within one of the
selected brushes in the 2D window, and drag
the walls into place to complete the square
around the floor.
Press ESC to deselect and finally press shift+H
to reveal all hidden brushes (ie the
ceiling).
|
|
Ok we have a wide area now, but the sky is
pressing down a bit, so we need to give
ourselves some more headroom.
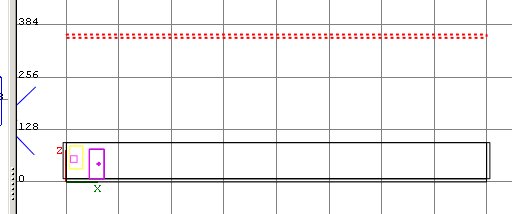
Select the ceiling brush. Press
ctrl+tab to get a side view in the 2D
window. Move the ceiling up a couple
of grid lines.
Press ESC. Select all 4 walls
(easiest by shift+clicking them in the 3D
window).
Return to the 2D window and put the
cursor above the walls, then drag them up to
meet the ceiling.
Press ESC. We've now made ourselves
a larger volume, and we're going to make it
represent the outdoors.
|
|
Now is as good a time as any to set the new
worldspawn values. Select any normal
brush and press N.
Click on the "mapcoordsmaxs"
line in the table, and then replace
"128 0" in the Value box with
"1024 0". Press return.
Click on the "mapcoordsmins"
line in the table, and then replace "0
128" in the Value box with "0
1024". Press return. Press
ESC.
|
|
|
|
|
This next bit is not strictly necessary, but
it will aid you when your map grows larger
and more complicated. Because you will
have a lot of caulked brushes in your 3D
view, it can be confusing trying to spot
what are supposed to be the outer boxes that
contain everything. There is another
purpose which I will cover later on.
So we will apply another texture to the
walls of our resized box, to reflect its
role as the container of the play
environment within it. It will also
demonstrate one of the most usual ways to
select multiple brushes.
In the 2D view, make sure you have the
top down view, and create a brush that
envelopes the entire cubic creation made so
far. Don't worry about what texture it
is nor how high the brush happens to be (as
seen in the 3D window).
Somewhere in the 2D window, doesn't
matter where, right click. Choose
Select/Select Complete Tall. This will
select all brushes that are completely
within the 2D box you've just drawn, even if
they happen to extend beyond it,
upwards/downwards, in the 3D view. It
also deletes the brush we had created
because it was created to define the set of
brushes we wanted to select.
Now we want to make the Hull Caulk
texture available to us for picking.
So click the Textures menu item, then
Common. You'll see lots of chequered
multi-coloured squares in your textures
window. You might want to set the
texture scale to 50% or 100% to make it
clearer (Textures/Texture Window
Scale). You might also want to resize
the textures window for a minute to help you
see what you've got.
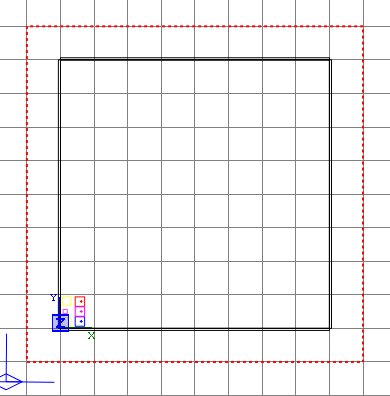
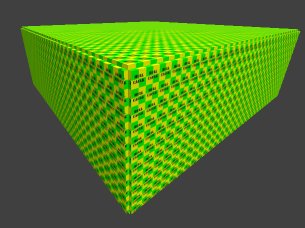
Find the Yellow/Green box labelled Hull
Caulk and click it. Then press ESC and
your box will now look like this:
|
|
|
|
|
In the 3D view, go inside the box - we need
to restore the interior textures.
Shift+ctrl+click the ceiling. Click
Textures/skies/skies_sd (note you want the skies
that has a subordinate skies_sd menu) and
click the sd_siwasky texture in the textures
window. The ceiling will now have
red/black check - don't worry about it.
Shift+ctrl+click the floor. Click
Textures/fueldump and click the snowfloor
texture (don't worry about the Hong Phong
text).
Shift+ctrl+click a wall.
Right-click so you can rotate the view in
the 3D window, and shift+alt+ctrl+click
the other 3 walls. Then right-click to
get your arrow cursor back.
Click Textures/battery_wall and click
wall03_mid texture. Press ESC to
deselect the faces.
Save your work and compile the map.
|
|
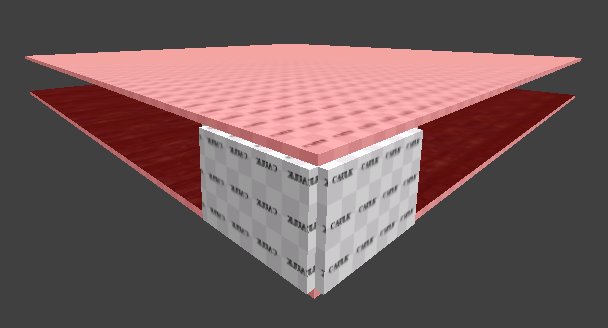
Run ET to check how your work is looking so
far - with luck it looks like this:
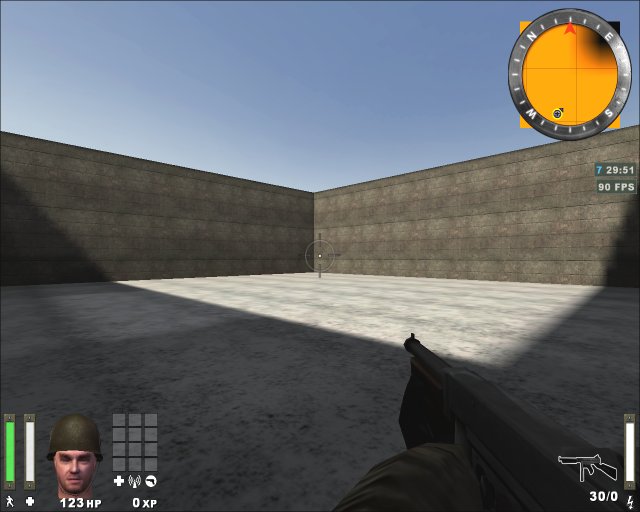
Run around a bit. Notice that you
are making snowy footstep sounds?
That's pretty neat, how does the program
know that a messy white/grey texture painted on
the ground should sound like snow?
The answer is "shaders", which
we'll cover later on.
|
|
Next lesson
|
|
|
|
|

