|
|
Run Radiant. Open the tutorial
map. Adjust zoom and scroll
(right-click and drag) in the 2D window so
you can see your building outline. You might
want to move your 3D view too so that you
can see what you are building in the 2D
window.
|
A quick way to find the area you want in your 2D window, which happens more
often as the map gets bigger and more complicated, is to select one of the
brushes of interest in the 3D view, and then press ctrl+tab. The
selected brush is now centred in the 2D window. Usually you would
press ctrl+tab twice more to return to the top down view.
|
|
|
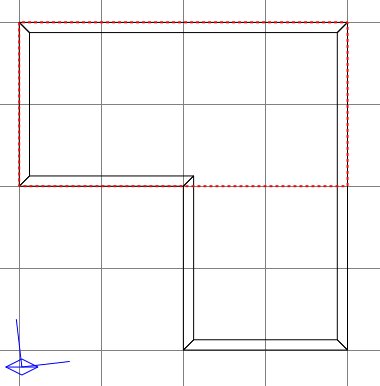
Press 8 to make the floor brush creation
very easy.
We're going to want to make a couple of
caulk brushes - rather than create them with
a random texture then caulk them, we'll set
the texture before creating the brushes:
click on the Caulk texture in the textures
window.
Make a brush as shown in this picture.
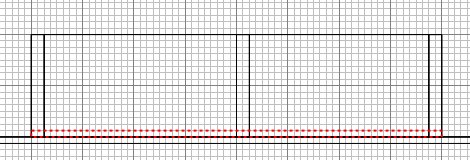
Press ctrl+tab to get a side
view. Press 4 to reduce the grid
scale, and then reduce the height of your
floor down to very flat:
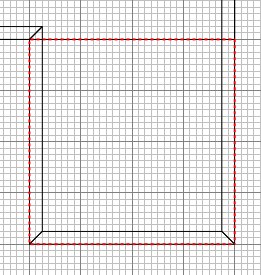
Press ctrl+tab twice to get back to the
normal 2D view. Press ESC.
Draw another brush as shown. This
one will be of the right height already as
you will immediately see in the 3D window :)
Press ESC. Select the environment
ceiling brush and Hide it - you will only
accidentally keep selecting it
otherwise. You can reveal hidden
brushes with shift+H.
|
|
With floors and ceilings it is often the
case that you accept some overlap with the
walls, and don't worry about the strip of
texture "wasted". It can
become just too grim trying to angle
everything to prevent this. However,
for the purpose of making quick progress we
are creating this building sitting on the
main exterior hull-caulked wall (which we've
given a snow texture to on one side) and
ordinarily you don't do that.
Generally we will have created terrain and
then set the building into it; or the
building will be contained in its own volume
of space, like our original tiny room.
In both of those cases you can usually
create an efficient floor space, in the
knowledge of what the player will actually
be able to see. We'll get to this
later.
So for now we're being a little quick and
dirty, but it will have a negligible effect
on FPS so don't worry.
Let's move our walls up a notch so that
they sit on the new floor.
Select all the walls in the 3D window by
shift+clicking them all one after the other.
Press ctrl+tab to get a side view.
Move the walls up one notch so they rest
on the floor brushes.
Press ESC, ctrl+tab twice, and
right-click/drag the building back into view
if it has wandered off centre.
Let's texture the floor. In the 3D view, ctrl+shift+click a floor
brush face.
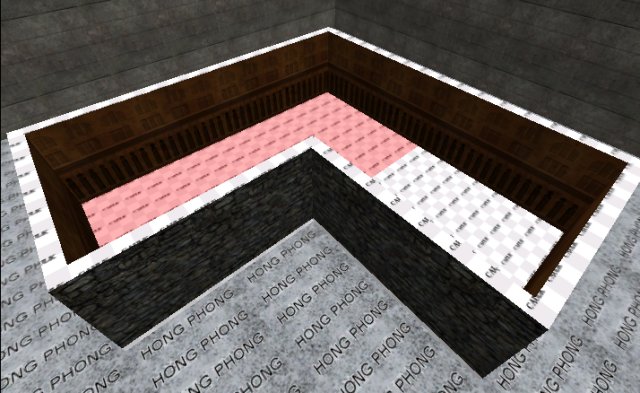
Then ctrl+shift+alt+click the other
brush's floor face.
Then click Textures/egypt/egypt_floor_sd
and click the block-16sq texture.
Remember you can adjust the relative
sizes of the Radiant windows so you can
access more easily what you want at any
given time. So I made the textures
window bigger, clicked the texture I
wanted, and then made it back to smaller
again. Also I find the Texture
Window Scale of 50% to usually be the most workable.
Press ESC to deselect the faces and press
8 to go back to a big grid
scale. Always worth doing as a
habit.
|
 You may have noticed that with
a small grid scale, when you zoom out, the
grid display loses the finer lines and only
draws major lines, giving the impression of
a larger grid scale. Mind you don't
get caught out by this. You may have noticed that with
a small grid scale, when you zoom out, the
grid display loses the finer lines and only
draws major lines, giving the impression of
a larger grid scale. Mind you don't
get caught out by this.
|
|
|
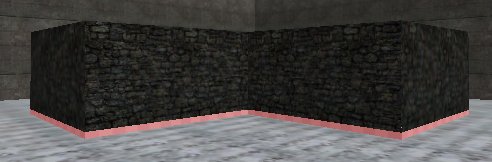
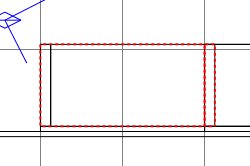
As the walls are now sitting on the floor,
we can see a thin rim around the bottom
which is the caulked sides of the floor
brushes. We'll need to texture them
too.
You can also see that by texturing the
lower edge of the longer floor brush, half
of its length will be obscured by the square
floor brush, which is something we can
easily avoid and it demonstrates another
option available to the mapper, the Clipper
Tool:
Select the large floor brush, and either
press X or click the button shown: 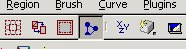
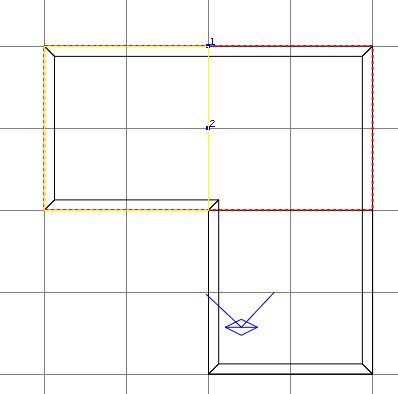
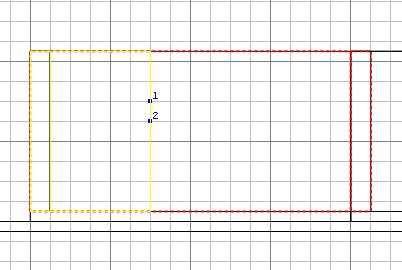
Click on the vertices shown in this
picture, starting with the uppermost
one. When you click on the first one,
the number 1 will appear next to it.
When you click on the second, the number 2
will appear, and the brush will be shown
with a dividing line defined by where you
clicked 1 and 2, with one chunk shown yellow
and the other still red.
The Clipper Tool has two functions.
It can...
- Crop an unwanted chunk of a brush: if
you were to press Return (don't in this
instance), the yellow section would
remain and the red would be deleted.
- Split a brush into two: if you press
shift+Return (yes please, do it now) the
brush is merely split along the line
defined.
Both chunks remain selected and the
cropper tool remains active. Press ESC
(or X or click the button again) to turn off
the cropper.
Press ESC to deselect the brushes.
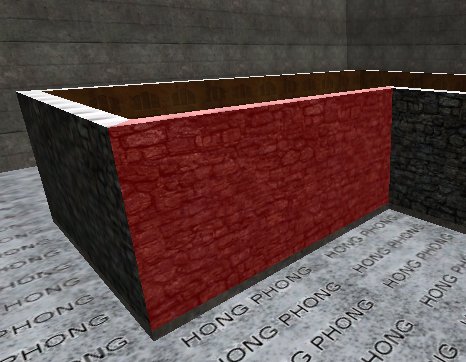
Now we can texture all the wall rim
without having some texture wastefully drawn
but not visible.
|
|
Select all the wall rims by
ctrl+shift+clicking one followed by
ctrl+shift+alt+clicking all the
others (in the 3D view). You'll need
to use the right-click in the 3D window to
allow free movement/turning in that view so
you can see all the rims. Don't forget
the ones round the back.
Apply a suitable texture, say
Textures/town/town_wall town_c61a.
Press ESC.
|
|
Another good habit
to cultivate is to deselect anything you're done
with. A very common
error is to leave something selected, then
select and work on something else, then
wonder wtf mangled your first brush into
such a bizarre shape :(
|
|
|
We'll hold off from putting a ceiling on for
a minute. Let's make an opening in a
wall so we can walk through it. If you
make a mistake during this, use ctrl+z to
undo. Also might be worth doing a
quick file save before you start, for good
measure :)
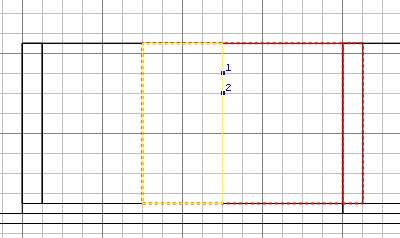
Select the indicated wall in the 3D
window, and press ctrl+tab to see it side
on.
Press 5 for a smaller grid scale,
then use the clipper tool and define a cut
line as shown:
Press shift+return to divide the brush
into 2.
In the 3D window, click on the smaller
chunk to deselect it, leaving the other
selected and the clipper active. Then
define another cut as shown.
Press shift+return to divide the brush
into 2.
In the 3D window, click on the larger
chunk to deselect it, leaving the other
selected and the clipper active. Then
define another cut as shown.
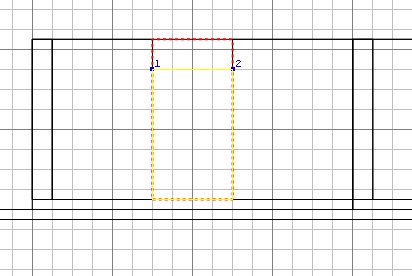
This time we want to make an empty door
space, but the yellow chunk is the wrong one
to keep - so press ctrl+return to swap the
yellow marker over, then press Return.
Press ESC twice now, as we are done
clipping.
We have an opening. The faces of
the opening are caulk so we must do
something about it.
For now, we won't bother putting in a
door frame, we'll be a bit quick and dirty
and texture the visible caulk. This is
slightly wasteful, because the two side
faces extend up beside the small chunk of
wall over the doorway. Later when we
make the door, we'll fix this. As I
said, sometimes it won't be worth the grief
in trying to stop everything from being
drawn if it won't be seen - but if you do
this where practicable, you'll keep the FPS
up and everyone playing will be grateful
that your map doesn't play like running
through custard :)
Select the 3 caulked faces that surround
the door opening. Apply Textures/wood
wood_c01 and press ESC.
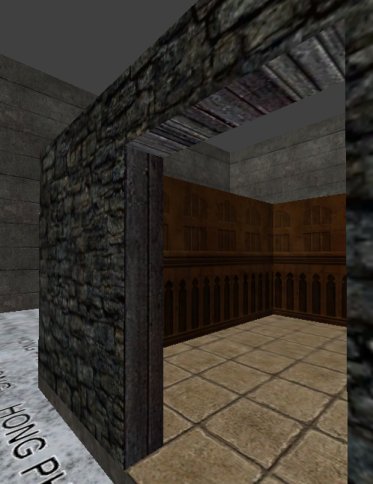
This leads us to another useful
technique, that of being able to orientate a
texture. We can see that the upright
wooden texture looks fine, but the
crossmember texture is aligned 90 degrees to
what we really wanted.
|
|
Select the face with the wrongly aligned
texture. Press S to get access
to the Surface Inspector. Click the
indicated up arrow twice to rotate the
texture through 90 degrees and click Done.
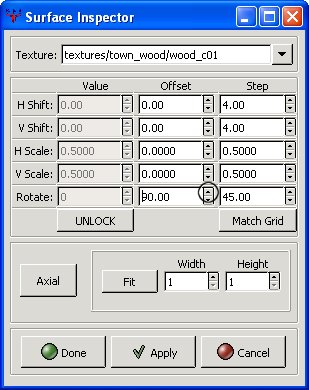
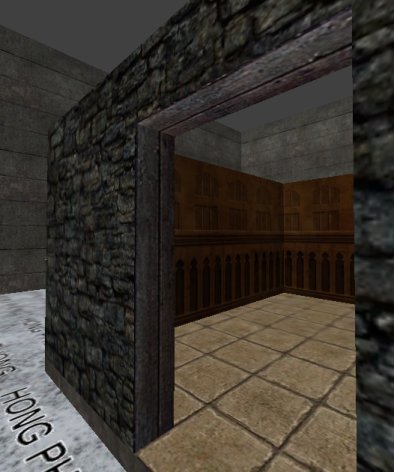
Press ESC to deselect the face.
Looks good now :)
|
|
Probably about time for you to trial your
creation so far. Let's put the allied
start point indoors.
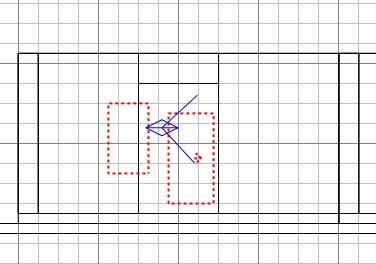
Press ctrl+tab until you get the overhead
view. Shift+click on the blue box and
the yellow box behind it. You can
actually select entities this way even
through intervening regular brushes, which
is quite handy.
Drag them into the room.
Press ctrl+tab and you will see the
player start is buried in the ground.
Lift the entities up a notch until the
player is on or just above the floor.
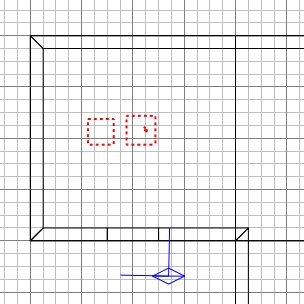
Press ESC and then select the player
start point alone. Press ctrl+tab to
get the overhead view. If you zoom in
you will see an arrow in the blue box.
It indicates the direction the player will
be looking in when he spawns.
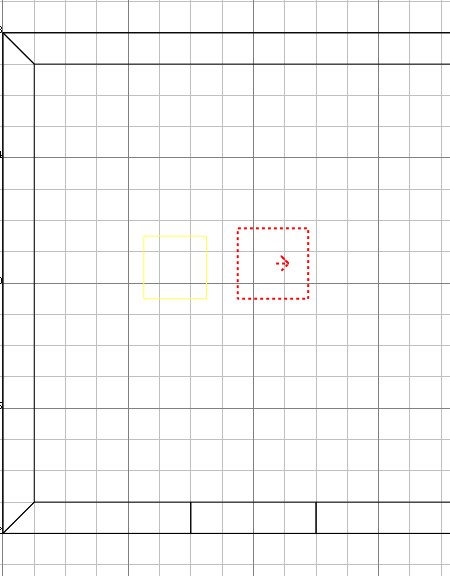
Let's get him to face the door.
Press N. At bottom left of the
Entities window is a little cluster of boxes
with degree angle numbers written in
them. Their arrangement in the box
indicates the direction the number
represents. Click the 270 button.
Close the Entities window and press ESC -
you can see now that the player will arrive
facing the door.
Save your work, compile it and give it a
little playtest. You should see
something like this:
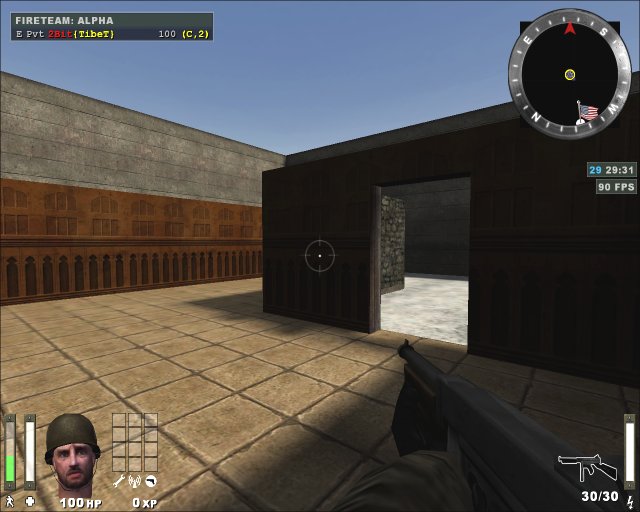
Notice that the indoor footsteps sound is
different to the snowy. The tiles used
don't actually have any special sound
properties given to them (in the way that
the snow texture has). Instead ET uses
a default footstep sound for anything not
coming with its own sound defined - and the
default is fine for this sort of texture
when walked on.
|
|
Well done if you've reached this far
successfully. You've actually used
many of the viewing/selecting/editing
techniques and tools that will be your
mainstay for much of your mapping
career. We'll add more to them later
on. In the next lesson we'll put in a
ceiling then go on to put some lights inside
the room, make a door and some windows we
can shoot.
|
|
Next lesson
|
|