2Bit's Mapping Corner on www.PythonOnline.co.uk
ET Mapping Tutorial

Lesson 13

Topics

Making barbed wire
 
Making the basic structure
Making the barbs hurt
Completing the structure
Back to main menu
Making the basic structure [Top]
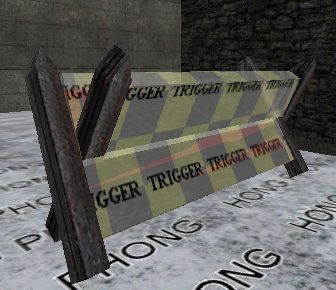
We're going to make some barbed wire, because it demonstrates a number of new features and techniques and reinforces some we've touched on before.  You'll use these a lot.

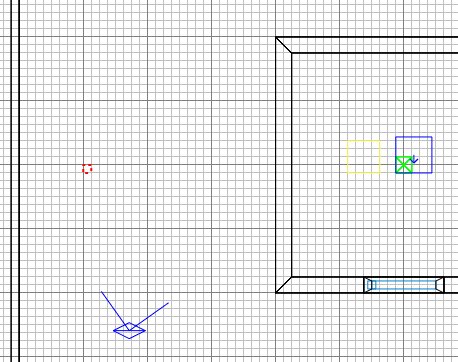
Run Radiant, open the map, and select one of the solitary explosive fence posts.  Duplicate it, right-click in the 2D and Ungroup Entity so that it returns to being a normal brush.  Drag the brush over to roughly where shown below.  This will be the first post of the barbed wire.

Ctrl+tab and make the post a bit higher, say the height of a player start box:

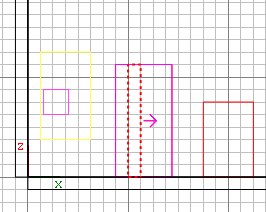
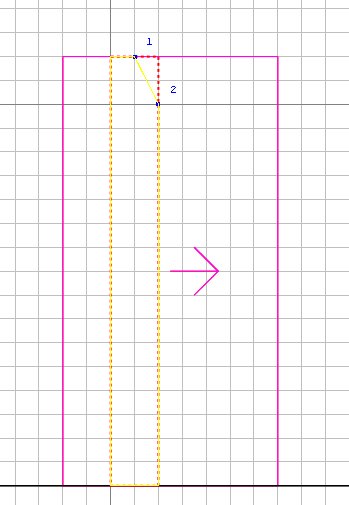
Press 3 and zoom in close.  Turn on the clipper tool (X) and click where marked:

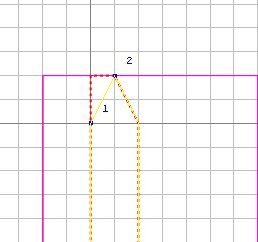
If the big chunk is not yellow, press ctrl+return so that it is.

Press return to chop off the small chunk.

Click again as shown, make sure the big part is yellow and press return to chop off the other small chunk.

Press X to turn clipping off.

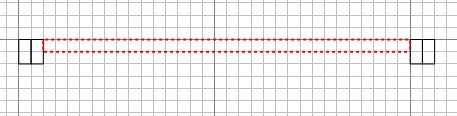
Ctrl+tab twice to get overhead view, zoom out again, press 8 and duplicate the post.  Move it a bit further away as shown.

Press ESC, then 3 to return to a 
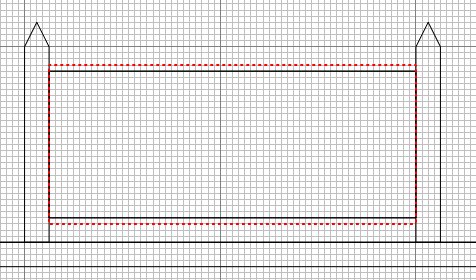
small grid scale.  We're going to 
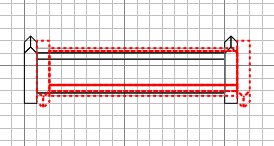
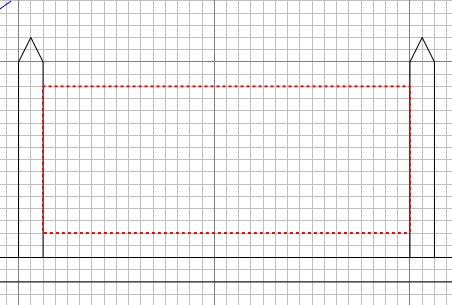
string some barbed wire between the posts.

Draw a brush as shown.  Click Textures\common and choose the NoDraw (pink/mauve check) texture for the whole brush.  As the name suggests, faces with NoDraw texture are not drawn.

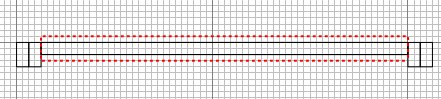
Ctrl+tab so you can set the height and position like this (press alt+2 or click View\Filter\Entities to prevent the display of entities (incl models) so that what you are working on is easier to see.  You can filter all sorts of things out of the display under the Filter menu).

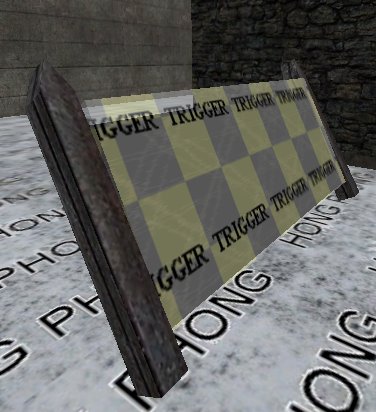
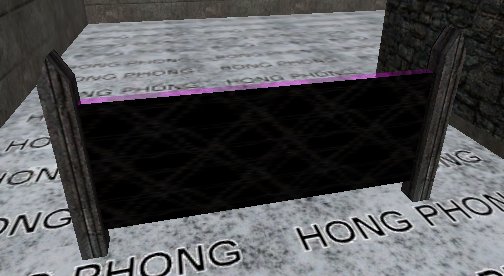
Right click in 2D and Make Detail.  Then select the face that is nearest the Axis start box and click Textures\alpha barb_wire.  Then press S, set the width and height boxes to 2 and press Fit.  We get the barbed wire texture compressed a bit to look better on the brush.

Ok so we have the barbed wire texture in place.  But the barbwire face on the nodraw brush won't stop the player from running through it.  We'll need to put a clip brush in there too.

Select the barbed wire brush and duplicate it.

The common textures should still be available to you in the textures window.  Click on the Clip (pink/red check) texture.

Then drag the clip brush back so it occupies exactly the same space as the barbed wire brush.

The clip brush, like the one for the tree, will not be drawn.  But unlike the Clip Weapon Wood, the Clip only stops player movement; it doesn't stop bullets or projectiles.

Press ESC.

Making the barbs hurt [Top]

Ok so we have barbed wire that players can't run through - now we need to make it hurt those that try :)

Select either the clip or barbed wire brush.  Duplicate it and click the Trigger (grey/pale yellow check) texture.  Move the trigger brush to be in the same place as the others.

Press 2 for some fine adjustment, zoom in if needed, and make the trigger brush slightly larger than the other brushes.

Get an overhead view and again expand the trigger brush a little.

It's not enough to make a brush into a trigger brush - you have to then turn it into a trigger entity.  Right click in the 2D and select trigger\trigger_hurt.

Press N (if you don't see tick boxes, close the window and press N again).

Tick Slow - so the hurt gets applied once per second.  Don't tick Silent, as we want the player to know it's hurting :)

Enter "dmg" as a key and say "15" as a value and press return.  Close the window.

Press ESC.

If you filtered entities, turn the filter off again now (alt+2), so that you will be able to see the trigger brush.  Otherwise Radiant will filter the entity once you deselect it.

Save your work.

Trigger brushes have many useful purposes, of which hurting players is just one.  When a player enters the volume of the trigger brush, the trigger is activated.  It might be to advise the player that he is near a constructible or a destructible, or that if he waves his pliers he could repair the tank or that if he presses Use he can pull a lever;  or it might cause any scripted event.  For example I have a trigger in the gap between the bank and the houses in Breakout.  When a player passes through it, it triggers the playing of a dog barking WAV file - a handy warning to others that someone is approaching... 
Completing the structure [Top]

Press 4.  Select the whole new structure and tilt it by clicking "Selection\rotate\arbitrary rotation..." and entering 30 in the X box.  Click OK.

You'll notice that some of the the wooden textures have not tilted - we'll fix that.

Press ESC.  Select both upright fence posts, and apply the wooden texture again (we want the wooden texture on the bottom of the posts this time, and they were caulk before this).  Press ESC.

Select the four faces on each fence post that need properly aligning, so you have eight faces selected.

Press S.  Change the Rotate Step value from 45 to 15.  Then click the Rotate Offset downarrow twice to apply a 30 degree tilt.  If you've done this right, you're fence post textures now line up properly.  Press ESC.

 Check you have the overhead view.  Select the whole structure, and duplicate it.  Click the Y-axis Flip button on the menu bar.

Move the brushes next to the first set.

The wooden textures on the uprights are wonky again.  Press ESC.  Select the 8 affected faces.  Press S. Enter 60 into the Rotate Offset box and click done.  Press ESC.

Select the whole structure, and click File\Save Selected..., navigate to your prefabs folder, and save it as prefab_barb as a map type.  Then you can import it as and when wanted into another map.

Press ESC.

Compile and experiment with running into your barbed wire!

Next lesson