|
Of all the constructibles, destructibles,
health cabinets and whatnot, the one thing
you really don't want to make from scratch
is a Command Post.
Ok you can make a constructible wall by
hand if you like, it's a little long-winded,
but quite easily achievable without
resorting to "here's one I made
earlier.".
But a Command Post has a number of
fiddly, angled models and a variety of
invisible brushes, and it really isn't
realistic to make one by hand.
So here are the prefabs you
need. :)
Unzip them and stick all 6 files into
your prefabs folder. There are 3 pairs
of .map and .script files, being a pair each
for the Allies, Axis and Neutral Command
Posts.
Run Radiant and open your map.
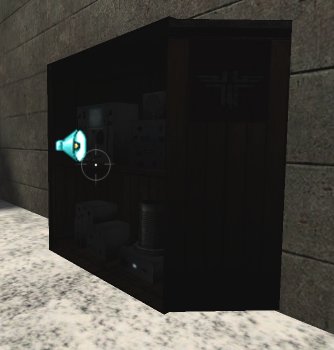
We'll put a Command Post against the
north wall. The command post model is
so complicated you really want to avoid
having to change its angle. So I
always find a suitable wall against which I
can stick a command post without having to
turn it around. You have been warned
:)
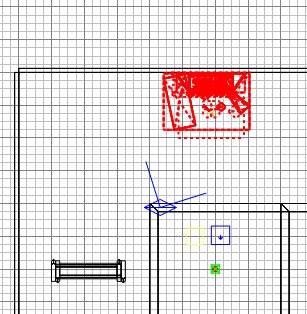
Suppose we want to put the Axis CP there.
Go to File/Import... and navigate to
prefab_axis_cp and import it. The
model will appear below/left of
(0,0,0). Drag it to the north
wall. It happens to have the correct Z
co-ord value of zero, because I tend to save
prefabs with a Z co-ord of 0, and I try to
keep much of my map floor surface around Z 0
for this reason. It makes building
things easier. (I also try to keep major
height differences to multiples of 128 or
256, because again it makes something
easier: texturing. It cuts down on
having to re-align a texture.)
Press ESC. Compile the map but
don't yet go to ET to test it.
Now edit the prefab_axis_cp.script, and
copy and paste the lot into the bottom of
your tutorial.script file. (As your
script file grows, try to position new
procedures in the right place
alphabetically, ie put "allies"
procedures before "axis", and
arrange all subsequent procedures by
alphabetical procedure name. This
makes it easier to find things later.)
Don't worry about trying to interpret the
contents of the Command Post procedure, it
works just fine and you don't need to know
how the script works (until later in the
tutorial.)
Save and exit from the .script file.
|